
 Deutsch
 Español
 Français
 Italiano
 Magyar
 Polski
 Slovenčina
 Čeština
Only submit a finished, tested build with accurate metadata, a complete privacy disclosure and reliable reviewer access. Do these three things and you remove most common causes of rejection: a mismatched privacy label, a locked demo account or a crash on first launch. The rest of this checklist walks through every category Apple’s App Review team checks, in the order you should check it yourself.
TL;DR:
- Keep every store asset aligned with shipped behavior; screenshots must match current screens, and names must stay within Apple’s 30 character limit.
- Recheck the Privacy Nutrition Label with every release, compare each external SDK manifest against actual collection, and provide account deletion and live policy links.
- Test key flows on physical devices across supported OS versions, and give reviewers working credentials, live services, and access to gated rewards without a purchase.
- Make each in app purchase visible in the build, and document subscription renewal, cancellation terms, age ratings, and required paperwork in review notes.
Store listing checklist: finalise name, description, screenshots and previews
Your product page is the first thing a reviewer sees, and inconsistencies here create doubt before anyone has even opened your build. Apple treats the App Review Guidelines as a promise that what you show matches what you ship, so every asset needs a final pass before submission.
Start with the basics. Your app name has a 30-character limit, and Apple will reject names that use trademarked terms you don’t own or that mislead users about functionality. Your description should read like a straightforward account of what the app actually does, not an aspirational one. If you wrote the description before the last three sprints, chances are it still mentions a feature you cut or omits one you added.
- Confirm the app name fits the 30 character limit and avoids trademarked terms or misleading claims
- Rewrite the description so it matches shipped features exactly, with no placeholder text left behind
- Capture screenshots from real in-app flows, across the device sizes you support, including localised versions where relevant
- Add app preview videos where they clarify a flow Apple might otherwise misunderstand, and avoid overlays that oversell functionality
- Finalise your subtitle, promotional text, keywords and any localised metadata variants
For a loyalty or rewards app, this step matters more than it might first appear. Screenshots showing a stamp card, a cashback balance or a referral flow need to reflect your current UI exactly, right down to the copy on buttons. Reviewers compare your screenshots against your running build, and a redesigned rewards screen that doesn’t match your App Store Connect assets is an easy, avoidable flag.
Keep your keyword field tight and relevant rather than padded. A long list of loosely related terms doesn’t help discovery and can read as an attempt to game search, which Apple’s guidelines specifically discourage. Treat your metadata as a contract with the reviewer: everything they read should hold up the moment they tap your icon.
Privacy details and third-party SDKs: what to disclose and how to prepare manifests
Every app submitted to the App Store must provide complete privacy details in App Store Connect, and these answers populate your Privacy Nutrition Label on the product page. This is mandatory for every new submission and every update, so a privacy label you completed two versions ago is not good enough if you’ve added an analytics SDK since.
One figure worth remembering: app completeness and related guideline issues account for over 40% of unresolved review problems, which makes privacy accuracy and build stability the two highest-leverage checks you can run before submitting.
Work through this order:
- Complete the Privacy Nutrition Label questions in App Store Connect and revisit them with every release, not just the first submission
- Use Xcode’s SDK privacy manifest aggregation to check that every third-party SDK you’ve integrated discloses what it actually collects
- Confirm your privacy policy URL is live and reachable both from inside the app and from your App Store product page
- Build an in-app account deletion flow, and describe your data retention and deletion behaviour clearly in the policy itself
- Add Info.plist purpose strings for every sensitive permission your app requests, written in plain language a user would understand
Third-party SDKs deserve particular attention. If a loyalty, analytics or push notification SDK collects more than your privacy label states, the mismatch surfaces during review and triggers a rejection that has nothing to do with your own code. Check each vendor’s manifest against what your privacy label claims before you submit, not after a rejection forces the comparison.
Functionality and performance checks: stability, device support and required capabilities
App completeness is the guideline category that catches the most submissions, and most of it comes down to things you can test yourself before Apple ever sees your build. Reviewers run your app on real devices, so anything that only worked reliably in the simulator is a risk.
Run through your supported OS versions on physical hardware, not just the latest iPhone in the simulator. Older devices and older iOS versions surface memory issues and layout bugs that newer hardware masks. Fix anything that crashes or blocks a core flow before you touch the submit button.
- Test on real devices across every OS version you claim to support, and resolve crashes or blocking bugs first
- Verify your backend services and any external integrations are live and reachable by the reviewer, not just by your internal test environment
- Provide a demo account, or an approved demo mode, whenever sign-in or specific hardware is required to see core functionality
- Match your Info.plist device capability declarations to what the app actually uses, rather than leaving defaults from a template
- Strip out placeholder content, lorem ipsum text or unfinished screens before you submit
Pro Tip: Keep a dedicated reviewer account live in a staging or production environment that mirrors your real backend, so you’re never scrambling to provision one the night before a deadline.
Apple’s own guidance on App Review is explicit that demo accounts and active backend services during the review window prevent a large share of avoidable delays. If your loyalty app gates reward redemption behind a purchase history or a linked card, build a reviewer path that shows that flow without requiring a real transaction.
Business rules and in-app purchases: configure, expose and document IAP and subscriptions
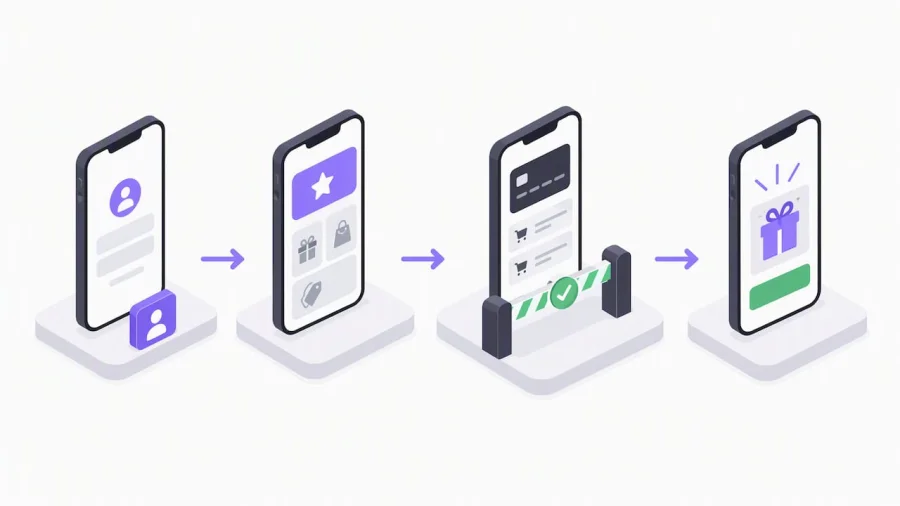
If your app sells anything through Apple’s payment system, the configuration has to be complete and the purchase itself has to be visible to the reviewer inside your actual build. A purchase that exists in App Store Connect but doesn’t appear anywhere in the app is one of the more frustrating rejections to receive, because the fix is usually a build issue rather than a policy one.
- Add and fully configure every in-app purchase and subscription in App Store Connect, then confirm each one is actually discoverable inside the submitted build
- Document subscription terms, renewal cadence and cancellation steps in both your review notes and your app’s metadata
- Answer the age rating questionnaire honestly, including any content descriptors that apply to your actual content
- Attach entity documentation in the Attachments area for any regulated service your app touches, such as financial or health-related functionality
For loyalty and rewards apps that offer paid tiers, cashback top-ups or premium subscription features, make sure the reviewer can reach the purchase screen without an unrelated login wall in the way. If a feature only unlocks after a points threshold or a loyalty tier upgrade, say so plainly in your review notes rather than leaving the reviewer to work it out.
Submission steps in App Store Connect and how to communicate with App Review
The submission process in App Store Connect has a specific sequence, and skipping ahead usually just means repeating a step later. Work through it in order.
- Fill in the App Review Information section with clear notes, demo credentials and any special configuration steps the reviewer needs to follow
- Attach supporting documentation for regulated categories, and include a short demo video if a feature depends on hardware the reviewer can’t access
- Choose the correct review type for your submission and confirm localised instructions are included where your app supports multiple languages
- If Apple sends a message asking for clarification, reply directly through App Store Connect and attach screenshots or files rather than resubmitting blind
- Run a final check of your metadata and binary, then submit
Apple recommends getting familiar with the guidelines early in development rather than treating them as a late-stage checklist, and the review workflow backs that up: review notes and attachments only help if they’re accurate and specific. Review happens continuously, and Apple’s own figures show that around 50% of submissions clear review within 24 hours and 90% within 48 hours, so a clean, complete submission is usually a fast one.
Pre-submission test plan: smoke tests, crash checks and accessibility validation
Before you submit, run a short, deliberate test pass rather than relying on whatever testing happened during development. This doesn’t need to be exhaustive, but it needs to cover the paths a reviewer will actually try.
- Smoke test sign-up, your core user flow, any purchase path and logout, on each device class you support
- Check your crash reporting dashboard for regressions introduced in the final build, and sanity check any critical error logs
- Validate the accessibility features you’ve declared in App Store Connect, including VoiceOver support, captions and large text handling
- Confirm your demo accounts and backend endpoints are reachable from the production environment the reviewer will actually use
- Decide whether a demo video or a demo account better shows a feature that depends on hardware, location or a linked device
Pro Tip: When a feature needs specialised hardware like a wearable or an NFC reader, a short demo video attached to your review notes is usually faster than trying to simulate the hardware for the reviewer.
This is also the right moment to use TestFlight for a final round of beta testing with a small group outside your own team. Fresh eyes catch broken links and confusing flows that your own team has stopped noticing.
Top rejection causes and short fixes to unblock a resubmission
Most rejections fall into a handful of repeatable categories, and most of them have a fast fix once you know what to look for.
- Screenshots or descriptions that don’t match current app behaviour: update the assets, or finish the feature, so the two line up
- Crashes or obvious bugs on supported devices: roll back the offending change or fix it, then verify on an actual device before resubmitting
- Incomplete privacy disclosures or SDK manifests that don’t match real data collection: update your privacy label and your SDK manifests together
- A reviewer account that doesn’t work, or a backend endpoint that’s down: provide working credentials and attach a short demo video as backup
- An in-app purchase the reviewer can’t find: check it’s configured correctly and visible in the build, and spell out where it sits in your review notes
Apple’s guideline reference on metadata accuracy is specific about this: users should know exactly what they’re getting, so any gap between your product page and your app’s real behaviour is treated as a trust problem, not a cosmetic one. Fix the root cause rather than the symptom, retest, and resubmit with a short note explaining what changed.
How loyalty-featured apps should prepare: an applied checklist
Apps built around points, stamps or cashback carry a few extra items worth checking before submission, and we see these come up often with the loyalty features we build at BonusQR.
- Confirm Apple Wallet pass integration is finalised, including card artwork and update behaviour, and describe it in your review notes
- Expose demo flows for earning points, redeeming rewards and sending referrals, with backend toggles the reviewer can use without a real purchase
- Document any data a loyalty SDK sends to third parties, such as a wallet provider or a push notification service, and make sure your privacy label reflects it exactly
- Keep your account deletion flow visible from within the loyalty profile screen, not buried behind a support ticket
A rewards app that gates its best feature behind a locked tier or a hidden promo code tends to confuse reviewers more than any other type of submission. Build a visible, working demo path for every reward mechanic you ship.
A note from Michal on getting this right the first time
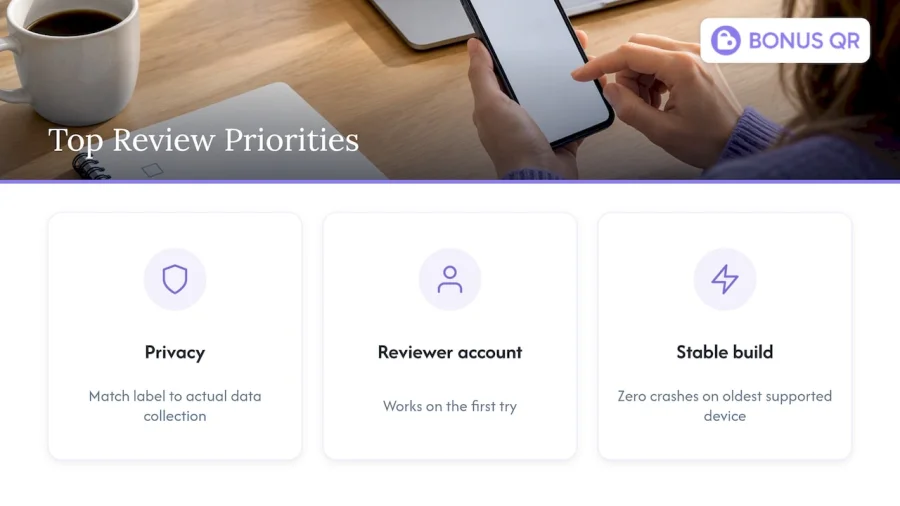
If you only prioritise three things from this checklist, make them these: a privacy label that matches your actual data collection, a reviewer account that works on the first try, and a build with zero crashes on the oldest device you support. Nearly every rejection we’ve seen traces back to one of those three.
Build this checklist into your release pipeline rather than treating it as a one-off task before a big launch. A short internal review, run the same way every time, catches far more than a rushed check the night before a deadline.
— Michal
FAQ
How hard is it to get an app approved on the App Store?
Approval is straightforward when your submission is complete: accurate metadata, a working demo account and no crashes resolve over 40% of the issues that otherwise stall review. Most difficulty comes from incomplete submissions rather than strict policy, and a clean build typically moves through quickly.
How can I approve my child’s app request?
This question usually refers to Apple’s Family Sharing or Ask to Buy settings, which let a parent approve downloads and purchases from a linked child account directly in Settings. It’s a device and account permission, not part of the developer-side App Review process covered in this checklist.
What are the guidelines for Apple app approval?
Apple’s App Review Guidelines cover safety, performance, business rules, design and legal requirements, with completeness and accurate metadata among the most commonly checked areas. Reviewers compare your actual app behaviour against what your product page and privacy label claim.
What is the typical timeline for app approval in the App Store?
Review runs continuously, and Apple reports that roughly 50% of submissions clear within 24 hours and 90% within 48 hours. Incomplete metadata, missing reviewer access or placeholder content are the most common causes of delay beyond that window.
What should I check before choosing a loyalty platform for my app’s reward features?
Look for a platform that supports Apple Wallet passes, gives you control over privacy disclosures for any third-party SDKs it includes, and offers demo or sandbox modes you can hand to reviewers. We built BonusQR’s loyalty plans and white-label app setup with these review requirements in mind, from Wallet pass behaviour through to backend toggles for demo accounts.
Sources
- App privacy details - Apple Developer
- App Review - Distribute - Apple Developer
- Submitting - App Store - Apple Developer
- 5.1.1(v) — Offering account deletion in your app - Apple Developer